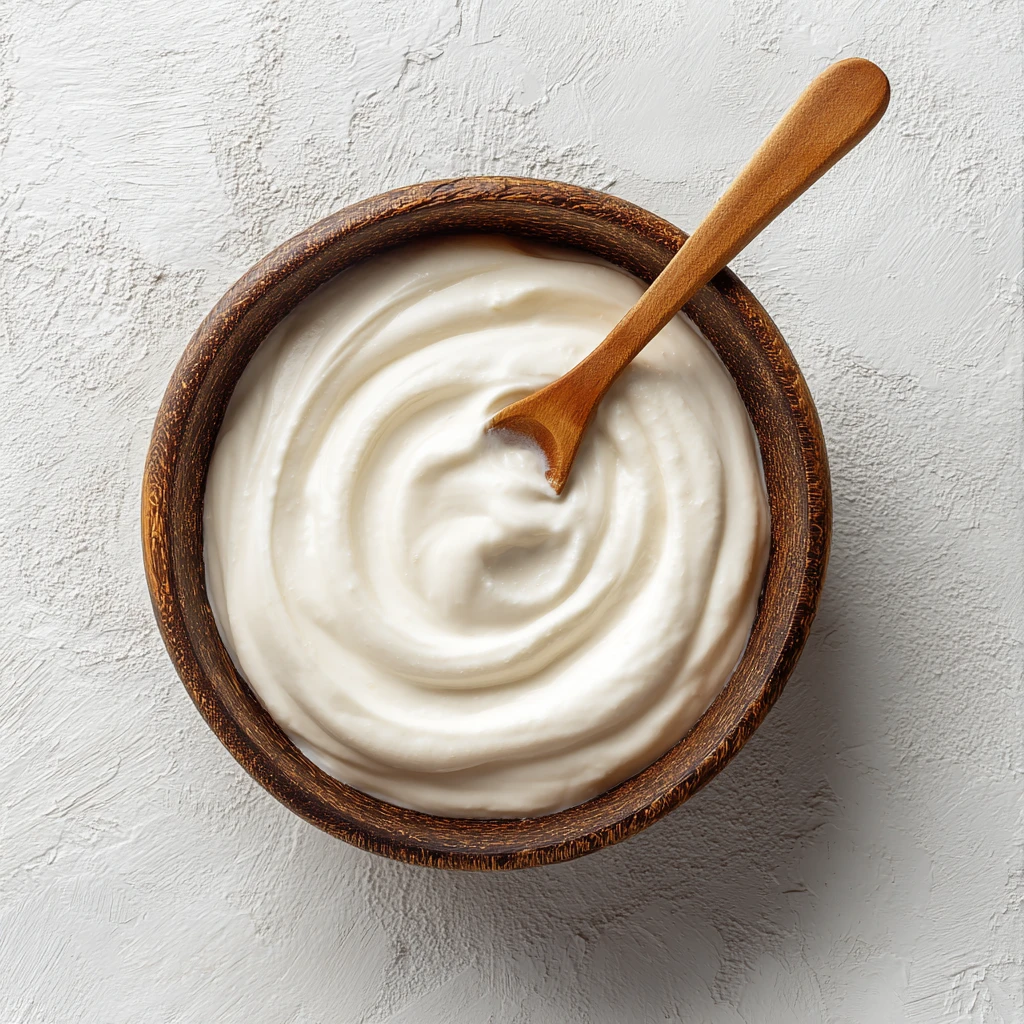
Homemade Yogurt
Introduction
Imagine the creamy goodness of homemade yogurt, crafted with love in your own kitchen. The journey from milk to yogurt is not only delicious but also a fulfilling experience that connects you to centuries-old traditions of fermentation. In this article, we will explore the art of making homemade yogurt, a process that requires patience, care, and a touch of magic.
Yogurt holds a special place in many cultures worldwide, revered for its probiotic benefits and versatility in both sweet and savory dishes. Whether you enjoy it plain, with fruits and granola, or as a marinade for meats, homemade yogurt brings a unique freshness that store-bought versions often lack.
Join us on this culinary adventure as we delve into the world of yogurt-making, uncovering the secrets to creating a creamy, tangy delight that will elevate your breakfasts, snacks, and meals to a whole new level.
Get ready to embark on a journey that will not only tantalize your taste buds but also empower you with the knowledge and skills to master the art of homemade yogurt.
Why You’ll Love This Recipe
Creating your own homemade yogurt is a rewarding experience that allows you to customize the tanginess and creaminess to suit your preferences. Say goodbye to artificial additives and hello to pure, wholesome goodness straight from your kitchen.
By making yogurt at home, you have full control over the ingredients, ensuring a healthier option free from preservatives and excess sugar. Additionally, the satisfaction of nurturing live cultures and watching them transform milk into a probiotic-rich delicacy is truly unmatched.
Whether you are a health-conscious individual looking to boost your gut health or a culinary enthusiast eager to explore the world of fermentation, homemade yogurt offers a myriad of benefits that will keep you coming back for more.
Experience the joy of creating something from scratch, savoring each spoonful of your homemade creation, knowing that it is a product of your dedication and love for good food.
Ingredients
To embark on your homemade yogurt-making journey, you will need the following simple ingredients:
– Fresh whole milk (preferably organic) – Yogurt starter culture or plain yogurt with live active cultures – A heavy-bottomed pot – A thermometer – A whisk – A clean kitchen towel or cheesecloth – A warm spot for incubation – Optional: sweeteners, flavorings, or fruit for serving
Feel free to experiment with different types of milk, such as goat or sheep milk, for unique flavors and textures. You can also use plant-based alternatives like soy or coconut milk for dairy-free yogurt options.
Remember, the quality of your ingredients will greatly impact the final taste and consistency of your homemade yogurt, so opt for the best you can afford.
Now that you have gathered your ingredients, it’s time to dive into the step-by-step instructions for creating your own creamy batch of homemade yogurt.
Step-by-Step Instructions
1. Heat the milk: Pour the fresh whole milk into a heavy-bottomed pot and heat it over medium heat, stirring occasionally to prevent scorching. Use a thermometer to monitor the temperature until it reaches around 180°F (82°C).
2. Cool the milk: Once the milk reaches the desired temperature, remove it from the heat and let it cool to around 110°F (43°C). This step is crucial to ensure the live cultures in the yogurt starter can thrive and ferment the milk.
3. Add the yogurt starter: In a separate bowl, mix a small amount of the warm milk with the yogurt starter culture or plain yogurt. Then, gently stir this mixture back into the rest of the milk until well combined.
4. Incubate the yogurt: Cover the pot with a clean kitchen towel or cheesecloth and place it in a warm spot to incubate for 6-8 hours. The longer you incubate, the tangier the yogurt will become. Check the consistency after 6 hours and adjust the time based on your desired taste.
5. Chill and enjoy: Once the yogurt has set to your liking, refrigerate it for a few hours to chill. Your homemade yogurt is now ready to be enjoyed plain, with toppings, or as a creamy addition to your favorite dishes.
Pro Tip: To achieve a thicker yogurt, you can strain the finished product through a cheesecloth or paper towel-lined sieve for a few hours in the refrigerator.
Expert Tips for Success
1. Use a clean, sterilized pot and utensils to prevent unwanted bacteria from affecting the fermentation process. 2. Avoid using ultra-pasteurized milk, as it may not yield the best results due to the high heat treatment. 3. Maintain a consistent temperature during incubation by placing the pot in a warm water bath or using a yogurt maker. 4. Experiment with different incubation times and temperatures to find your preferred level of tanginess and thickness. 5. Save a small portion of your homemade yogurt to use as a starter for future batches, ensuring a continuous cycle of fresh, homemade goodness.
Variations and Substitutions
For a dairy-free alternative, you can use coconut milk or almond milk as the base for your homemade yogurt. Simply follow the same steps, adjusting the incubation time as needed for optimal results.
To add a touch of sweetness, consider mixing in honey, maple syrup, or agave nectar after the yogurt has set. You can also experiment with flavorings like vanilla extract, cinnamon, or blended fruits for a customized taste experience.
For a thicker consistency similar to Greek yogurt, strain the finished product through a cheesecloth or nut milk bag for several hours in the refrigerator. The result is a rich, velvety yogurt perfect for creamy dips and spreads.
Feel free to get creative with your homemade yogurt by incorporating various mix-ins such as nuts, seeds, granola, or chocolate chips. The possibilities are endless when it comes to customizing your yogurt to suit your taste preferences.
Serving Suggestions
Homemade yogurt can be enjoyed in a myriad of ways, from a simple breakfast parfait to a tangy marinade for grilled meats. Serve your creamy creation with a drizzle of honey, a sprinkle of crunchy granola, or a dollop of homemade fruit compote for a delightful treat.
Pair your homemade yogurt with fresh berries, sliced bananas, or diced mango for a burst of natural sweetness and vibrant colors. You can also use it as a base for smoothies, salad dressings, or frozen yogurt popsicles for a refreshing summer dessert.
Experiment with savory applications by using homemade yogurt as a creamy topping for spicy curries, roasted vegetables, or baked potatoes. The cooling effect of yogurt complements bold flavors and adds a luxurious touch to any dish.
Get creative in the kitchen and explore the endless possibilities of incorporating homemade yogurt into your daily meals, elevating each dish with a touch of creamy goodness and probiotic richness.
FAQs
Q: Can I use skim milk or low-fat milk to make homemade yogurt?
A: While you can use skim or low-fat milk, keep in mind that the final texture and creaminess of the yogurt may differ from using whole milk. Whole milk typically yields a richer and creamier yogurt due to its higher fat content.
Q: How long does homemade yogurt last in the refrigerator?
A: Homemade yogurt can typically last 1-2 weeks in the refrigerator when stored in a sealed container. Be sure to check for any signs of spoilage, such as off smells or mold, before consuming.
Q: Can I use store-bought flavored yogurt as a starter for homemade yogurt?
A: It is best to use plain yogurt with live active cultures as a starter for your homemade batch. Flavored yogurts may contain additives or sweeteners that could interfere with the fermentation process.
Q: How can I make my homemade yogurt thicker?
A: To achieve a thicker consistency, you can strain the yogurt through a cheesecloth or paper towel-lined sieve for a few hours in the refrigerator. The longer you strain, the thicker the yogurt will become.
Final Thoughts
Congratulations on mastering the art of homemade yogurt! By following these simple steps and tips, you have unlocked the door to a world of creamy goodness and culinary creativity. Whether you enjoy your yogurt plain, swirled with honey, or mixed with your favorite toppings, the satisfaction of creating something wholesome and delicious from scratch is truly unbeatable.
Remember, homemade yogurt is not just a food—it’s a labor of love that nourishes both body and soul. So, grab your pot, heat up some milk, and embark on this delightful yogurt-making journey that promises endless batches of probiotic-rich goodness and culinary joy.
Share your homemade yogurt adventures with friends and family, spreading the joy of DIY fermentation and the simple pleasures of homemade goodness. Cheers to many more creamy creations and flavorful experiments in your kitchen!
Homemade Yogurt
Make your own creamy and tangy homemade yogurt using simple ingredients and easy steps. This recipe allows you to customize the tanginess and creaminess of your yogurt while ensuring a healthier option free from additives and excess sugar.
Ingredients
- Fresh whole milk (preferably organic)
- Yogurt starter culture or plain yogurt with live active cultures
- A heavy-bottomed pot
- A thermometer
- A whisk
- A clean kitchen towel or cheesecloth
- A warm spot for incubation
- Optional: sweeteners, flavorings, or fruit for serving
Directions
-
Heat the fresh whole milk in a heavy-bottomed pot over medium heat until it reaches around 180°F (82°C), stirring occasionally.
-
Let the milk cool to around 110°F (43°C) after heating.
-
Mix a small amount of warm milk with the yogurt starter culture or plain yogurt in a separate bowl, then combine it with the rest of the milk.
-
Cover the pot with a clean kitchen towel or cheesecloth and incubate in a warm spot for 6-8 hours.
-
Refrigerate the yogurt for a few hours before enjoying plain or with desired toppings.
-
For thicker yogurt, strain the finished product through a cheesecloth in the refrigerator.