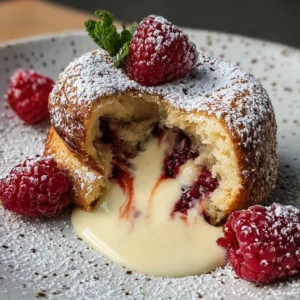
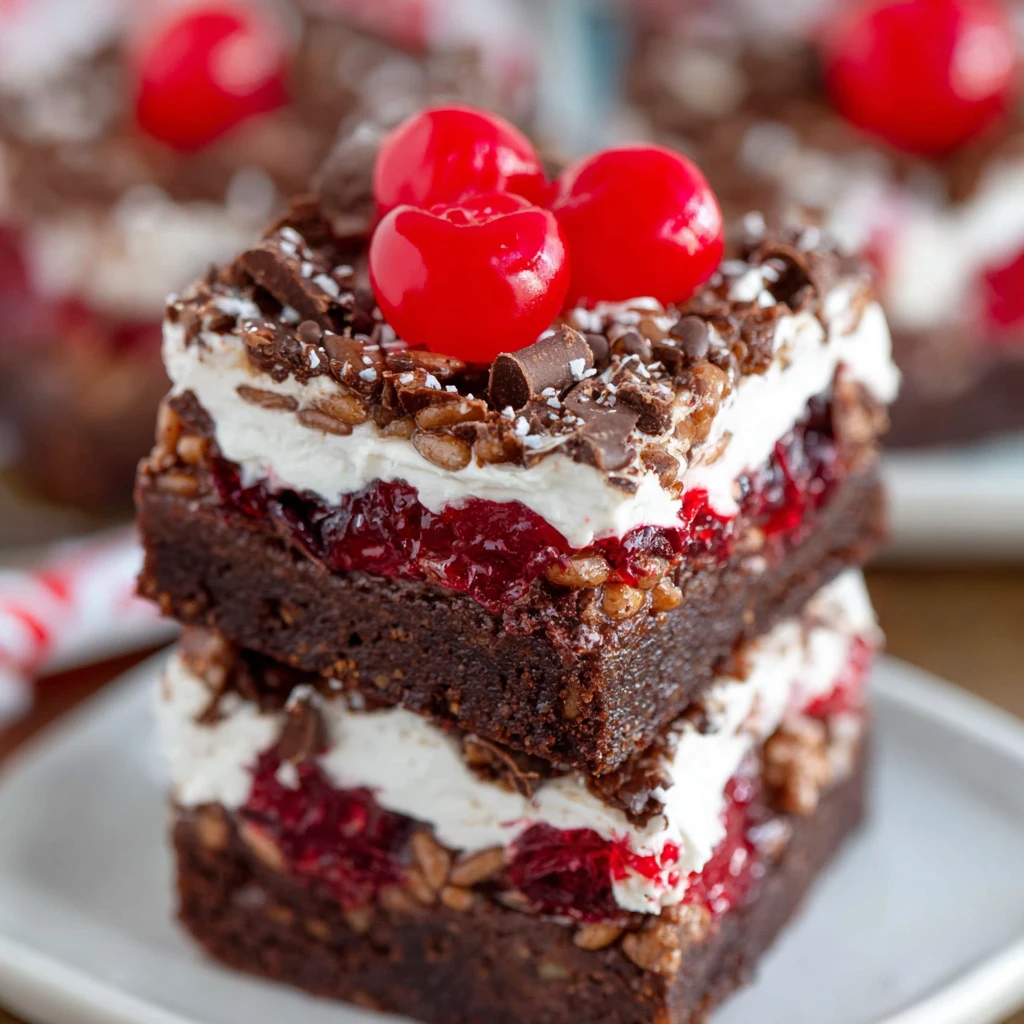
Cherry Brownie Dream Bars
Introduction
Imagine sinking your teeth into a delectable treat that combines the rich flavor of cherries with the indulgent sweetness of brownies. Cherry Brownie Dream Bars are the perfect fusion of two beloved desserts, creating a heavenly taste experience that will leave you craving more.
These bars are not just any ordinary dessert; they are a delightful blend of textures and flavors that will tantalize your taste buds and leave you wanting to share the joy with friends and family. Whether you are a baking enthusiast or a dessert lover looking for something new to try, these Cherry Brownie Dream Bars are sure to impress.
With a history as rich as their flavor, these bars have been enjoyed for generations, passed down through families and shared at gatherings to create lasting memories. Let’s dive into what makes these bars so special and why they deserve a spot in your baking repertoire.
Get ready to embark on a culinary journey that will elevate your dessert game and make you a star in the kitchen!
Why You’ll Love This Recipe
One of the standout features of these Cherry Brownie Dream Bars is their irresistible combination of sweet and tangy flavors. The tartness of the cherries pairs perfectly with the decadent richness of the brownie layer, creating a harmonious balance that is truly divine.
Not only are these bars a treat for your taste buds, but they are also incredibly easy to make, making them a perfect option for both novice and experienced bakers. The simplicity of the recipe allows you to whip up a batch in no time, satisfying your dessert cravings in a flash.
Additionally, these bars offer a delightful twist on traditional brownies, adding a fruity element that sets them apart from the usual chocolatey treats. Whether you are a fan of cherries or simply looking to try something new, these Cherry Brownie Dream Bars are sure to win you over.
Indulgent, flavorful, and oh-so-satisfying, these bars are a must-try for anyone who appreciates the magic of combining classic flavors in a fresh and exciting way.
Ingredients
For this delightful recipe, you will need the following ingredients:
– Fresh cherries, pitted and halved – All-purpose flour – Cocoa powder – Sugar – Butter – Eggs – Vanilla extract – Salt
Feel free to customize the recipe to suit your preferences by adding nuts, chocolate chips, or a sprinkle of sea salt on top for an extra layer of flavor. You can also opt for gluten-free flour or dairy-free alternatives to accommodate dietary restrictions.
By using high-quality ingredients, you can enhance the overall taste and texture of these Cherry Brownie Dream Bars, creating a dessert that is truly unforgettable.
Now that you have gathered your ingredients, it’s time to dive into the step-by-step instructions to bring this delicious recipe to life.
Step-by-Step Instructions
1. Preheat your oven to 350°F (175°C) and line a baking dish with parchment paper.
2. In a bowl, combine the flour, cocoa powder, and salt. Set aside.
3. In a separate bowl, melt the butter and stir in the sugar until well combined.
4. Add the eggs and vanilla extract to the butter mixture, whisking until smooth.
5. Gradually fold in the dry ingredients until a thick batter forms.
6. Pour half of the batter into the prepared baking dish and smooth it out with a spatula.
7. Arrange the cherries on top of the batter in a single layer, then cover them with the remaining batter.
8. Bake for 25-30 minutes or until a toothpick inserted into the center comes out clean.
9. Allow the bars to cool before slicing them into squares and serving.
These step-by-step instructions will guide you through the process of creating these mouthwatering Cherry Brownie Dream Bars with ease. Now, let’s explore some expert tips for ensuring your bars turn out perfectly every time.
Expert Tips for Success
To achieve the best results when making Cherry Brownie Dream Bars, consider the following tips:
– Use fresh cherries for optimal flavor and texture. – Be careful not to overmix the batter to avoid a tough final product. – Adjust the sweetness level by adding more or less sugar to suit your taste preferences. – Allow the bars to cool completely before cutting them to ensure clean slices. – Store any leftovers in an airtight container at room temperature for up to 3 days.
By keeping these expert tips in mind, you can elevate your baking skills and create Cherry Brownie Dream Bars that are sure to impress your friends and family.
Variations and Substitutions
If you’re looking to put a twist on this classic recipe, consider the following variations:
– Swap the cherries for raspberries or blueberries for a different fruity flavor. – Add a swirl of cream cheese into the batter for a creamy texture. – Mix in chopped nuts or shredded coconut for added crunch and depth of flavor. – Drizzle melted chocolate on top of the bars for a decadent finishing touch.
Feel free to get creative and experiment with different ingredients to customize these Cherry Brownie Dream Bars to your liking. The possibilities are endless!
Serving Suggestions
For a truly indulgent experience, serve these Cherry Brownie Dream Bars warm with a scoop of vanilla ice cream on top. The contrast of the warm, gooey bars against the cold, creamy ice cream is a match made in dessert heaven.
You can also dust the bars with powdered sugar or cocoa powder before serving for a visually appealing touch. Pair them with a cup of freshly brewed coffee or a glass of cold milk for the perfect accompaniment to this delightful treat.
Whether you enjoy them as a midday snack, a post-dinner dessert, or a sweet treat to share with loved ones, these Cherry Brownie Dream Bars are sure to bring joy to any occasion.
FAQs
Q: Can I use frozen cherries instead of fresh ones?
A: While fresh cherries are recommended for the best flavor and texture, you can use frozen cherries that have been thawed and patted dry. Just be sure to adjust the baking time accordingly.
Q: Can I make these bars ahead of time?
A: Yes, you can prepare these bars in advance and store them in the refrigerator for up to 3 days. Simply reheat them in the oven before serving for a fresh-from-the-oven experience.
Q: Can I freeze the bars for later?
A: Absolutely! These Cherry Brownie Dream Bars freeze well. Wrap them tightly in plastic wrap and aluminum foil before placing them in the freezer. Thaw them in the refrigerator overnight before serving.
Final Thoughts
In conclusion, Cherry Brownie Dream Bars are a delightful dessert that combines the best of both worlds – the fruity goodness of cherries and the chocolatey decadence of brownies. With their easy preparation, versatile nature, and irresistible taste, these bars are sure to become a favorite in your baking repertoire.
Whether you enjoy them on a cozy evening at home or share them with friends at a gathering, these bars are bound to impress with their delicious flavor and beautiful presentation. So, roll up your sleeves, preheat your oven, and get ready to bake up a batch of Cherry Brownie Dream Bars that will have everyone asking for seconds!
Indulge in the magic of these delightful bars and let your taste buds savor the sweet symphony of flavors with every bite. Happy baking!
Cherry Brownie Dream Bars
Delight in the magical fusion of cherry goodness and chocolatey decadence with these Cherry Brownie Dream Bars. Perfectly balancing sweet and tangy flavors, these bars offer a delightful twist on traditional brownies, making them a must-try for all dessert enthusiasts.
Ingredients
- Fresh cherries, pitted and halved
- 1 cup all-purpose flour
- 1/2 cup cocoa powder
- 1 cup sugar
- 1/2 cup butter
- 2 eggs
- 1 teaspoon vanilla extract
- 1/4 teaspoon salt
Directions
-
Preheat oven to 350°F (175°C) and line a baking dish with parchment paper.
-
In a bowl, combine flour, cocoa powder, and salt. Set aside.
-
Melt butter in a separate bowl and stir in sugar until well combined.
-
Add eggs and vanilla extract to the butter mixture, whisk until smooth.
-
Gradually fold in the dry ingredients until a thick batter forms.
-
Pour half of the batter into the prepared baking dish and smooth it out.
-
Arrange cherries on top of the batter in a single layer, then cover with the remaining batter.
-
Bake for 25-30 minutes or until a toothpick inserted in the center comes out clean.
-
Allow bars to cool before slicing into squares and serving.